The proof is in the pruning
0 comment
The proof is in the pruning Pruning stimulates dense growth and reduces the plants natural tendency to grow as rapidly as possible, which would lead to a thin, sparse hedge. When to prune? How to prune? How often to prune? Am I cutting too much? Am I cutting too little? What are the best tools to use? …These are just some of the questions our friends at Hedges Direct get asked, so we thought we’d team up and explore the complicated world of hedging pruning.Find out more about pruning below from our friends at Hedges Direct, who supply garden products to the Small Space Gardens and Beautiful Borders at BBC Gardeners’ World Spring Fair. Written by Hedges Direct Deciduous hedging Deciduous hedging is pruned in the summer to stop plants becoming unruly. This is considered maintenance pruning. In winter, deciduous shrubs, which shed their leaves, can be reshaped by cutting back hard. Most deciduous woody plants, including beech and hornbeam put on two flushes of growth in a year, one main flush during spring, and a second, smaller spurt, during late summer. Ideally, they should be trimmed back after each flush to keep them tidy.Beech and Hornbeam (carpinus betulus) hedging is best trimmed in August or September, as this will enhance the winter appearance and help to keep leaves on the branches for longer. Cut both hedges again in February if you want to keep them crisp. Tackle any major pruning as the plants go dormant and don’t prune in very dry weather.Deciduous flowering hedging plants such as Rosa Rugosa are pruned in spring, when you simply thin out any leggy growth. Hedges such as Hawthorn and Hazel can be trimmed between June and September. /*! elementor - v3.19.0 - 07-02-2024 */ .elementor-widget-image{text-align:center}.elementor-widget-image a{display:inline-block}.elementor-widget-image a img[src$=".svg"]{width:48px}.elementor-widget-image img{vertical-align:middle;display:inline-block} Evergreen Hedging Evergreen plants like box and privet are often grown as hedging plants for their ability to cope with close trimming to create a dense stable mass of woody stems covered in foliage.Most evergreen hedging plants are vigorous shrubs and trees, which can be pruned at least twice a year, though more frequent cutting will create a denser hedge. By trimming in late spring and early summer, the young soft growth is targeted, which us easy to cut using shears or a powered hedgetrimmer. You could also cut later in summer, though this will result in a looser hedge which needs a more time-consuming cut with secateurs.Our friends at BBC Gardeners’ World Magazine have some further tips on how to trim an Evergreen hedge here. Tools of the trade Most people say it’s best to use secateurs or hand shears, so you don’t tear into the leaf, making it turn brown. Whichever tool you choose, prune back the new long shoots at an angle to two or three leaves from its base.Take a look at some of Hedges Direct’s garden shears here, from their Five Acres garden tools. Finesse your technique When you start pruning a large hedge, trim from the bottom to the top. This is very important, as it allows more sunlight to reach the bottom of the plants.You’re aiming eventually to have cut the hedge into an A shape; the slope you create is known as a ‘batter’. If you just cut upwards in a straight line, the top of the hedge, which always gets more sunlight anyway, will shade the base and you’ll have a plant that’s weaker at the bottom.If you’re cutting a formal hedge it’s worth putting up a line string to keep it level. Set the line of string by eye or by measuring from ground level on each cane, ensuring that the string is the same height all the way along. If there are any dips in the hedge that fall below the line, leave them uncut so that they can fill out.To minimise damage to individual leaves, hedging plants with large leaves, such as Hornbeam, are best cut with secateurs rather than shears or a hedge trimmer. The extra time and effort is worth it, if the hedge is in a very visible position. When using a hedge trimmer or shears you end up with a lot of cut leaves and these can turn brown and unsightly in hot weather. /*! elementor - v3.19.0 - 07-02-2024 */ .elementor-widget-divider{--divider-border-style:none;--divider-border-width:1px;--divider-color:#0c0d0e;--divider-icon-size:20px;--divider-element-spacing:10px;--divider-pattern-height:24px;--divider-pattern-size:20px;--divider-pattern-url:none;--divider-pattern-repeat:repeat-x}.elementor-widget-divider .elementor-divider{display:flex}.elementor-widget-divider .elementor-divider__text{font-size:15px;line-height:1;max-width:95%}.elementor-widget-divider .elementor-divider__element{margin:0 var(--divider-element-spacing);flex-shrink:0}.elementor-widget-divider .elementor-icon{font-size:var(--divider-icon-size)}.elementor-widget-divider .elementor-divider-separator{display:flex;margin:0;direction:ltr}.elementor-widget-divider--view-line_icon .elementor-divider-separator,.elementor-widget-divider--view-line_text .elementor-divider-separator{align-items:center}.elementor-widget-divider--view-line_icon .elementor-divider-separator:after,.elementor-widget-divider--view-line_icon .elementor-divider-separator:before,.elementor-widget-divider--view-line_text .elementor-divider-separator:after,.elementor-widget-divider--view-line_text .elementor-divider-separator:before{display:block;content:"";border-block-end:0;flex-grow:1;border-block-start:var(--divider-border-width) var(--divider-border-style) var(--divider-color)}.elementor-widget-divider--element-align-left .elementor-divider .elementor-divider-separator>.elementor-divider__svg:first-of-type{flex-grow:0;flex-shrink:100}.elementor-widget-divider--element-align-left .elementor-divider-separator:before{content:none}.elementor-widget-divider--element-align-left .elementor-divider__element{margin-left:0}.elementor-widget-divider--element-align-right .elementor-divider .elementor-divider-separator>.elementor-divider__svg:last-of-type{flex-grow:0;flex-shrink:100}.elementor-widget-divider--element-align-right .elementor-divider-separator:after{content:none}.elementor-widget-divider--element-align-right .elementor-divider__element{margin-right:0}.elementor-widget-divider--element-align-start .elementor-divider .elementor-divider-separator>.elementor-divider__svg:first-of-type{flex-grow:0;flex-shrink:100}.elementor-widget-divider--element-align-start .elementor-divider-separator:before{content:none}.elementor-widget-divider--element-align-start .elementor-divider__element{margin-inline-start:0}.elementor-widget-divider--element-align-end .elementor-divider .elementor-divider-separator>.elementor-divider__svg:last-of-type{flex-grow:0;flex-shrink:100}.elementor-widget-divider--element-align-end .elementor-divider-separator:after{content:none}.elementor-widget-divider--element-align-end .elementor-divider__element{margin-inline-end:0}.elementor-widget-divider:not(.elementor-widget-divider--view-line_text):not(.elementor-widget-divider--view-line_icon) .elementor-divider-separator{border-block-start:var(--divider-border-width) var(--divider-border-style) var(--divider-color)}.elementor-widget-divider--separator-type-pattern{--divider-border-style:none}.elementor-widget-divider--separator-type-pattern.elementor-widget-divider--view-line .elementor-divider-separator,.elementor-widget-divider--separator-type-pattern:not(.elementor-widget-divider--view-line) .elementor-divider-separator:after,.elementor-widget-divider--separator-type-pattern:not(.elementor-widget-divider--view-line) .elementor-divider-separator:before,.elementor-widget-divider--separator-type-pattern:not([class*=elementor-widget-divider--view]) .elementor-divider-separator{width:100%;min-height:var(--divider-pattern-height);-webkit-mask-size:var(--divider-pattern-size) 100%;mask-size:var(--divider-pattern-size) 100%;-webkit-mask-repeat:var(--divider-pattern-repeat);mask-repeat:var(--divider-pattern-repeat);background-color:var(--divider-color);-webkit-mask-image:var(--divider-pattern-url);mask-image:var(--divider-pattern-url)}.elementor-widget-divider--no-spacing{--divider-pattern-size:auto}.elementor-widget-divider--bg-round{--divider-pattern-repeat:round}.rtl .elementor-widget-divider .elementor-divider__text{direction:rtl}.e-con-inner>.elementor-widget-divider,.e-con>.elementor-widget-divider{width:var(--container-widget-width,100%);--flex-grow:var(--container-widget-flex-grow)} If you have any advice you’d like to ask our friends at Hedges Direct, make sure to find out more on their website here. You can also contact them with your questions or share your own hedge blog by email, on Facebook or on Twitter.With thanks to: Looking for spring inspiration? Discover the Showcase Gardens from Spring Fair here Delve into more garden inspiration, top tips and hear all our latest news
The proof is in the pruning
0 comment
The proof is in the pruning Pruning stimulates dense growth and reduces the plants natural tendency to grow as rapidly as possible, which would lead to a thin, sparse hedge. When to prune? How to prune? How often to prune? Am I cutting too much? Am I cutting too little? What are the best tools to use? …These are just some of the questions our friends at Hedges Direct get asked, so we thought we’d team up and explore the complicated world of hedging pruning.Find out more about pruning below from our friends at Hedges Direct, who supply garden products to the Small Space Gardens and Beautiful Borders at BBC Gardeners’ World Autumn Fair. Written by Hedges Direct Deciduous hedging Deciduous hedging is pruned in the summer to stop plants becoming unruly. This is considered maintenance pruning. In winter, deciduous shrubs, which shed their leaves, can be reshaped by cutting back hard. Most deciduous woody plants, including beech and hornbeam put on two flushes of growth in a year, one main flush during spring, and a second, smaller spurt, during late summer. Ideally, they should be trimmed back after each flush to keep them tidy.Beech and Hornbeam (carpinus betulus) hedging is best trimmed in August or September, as this will enhance the winter appearance and help to keep leaves on the branches for longer. Cut both hedges again in February if you want to keep them crisp. Tackle any major pruning as the plants go dormant and don’t prune in very dry weather.Deciduous flowering hedging plants such as Rosa Rugosa are pruned in spring, when you simply thin out any leggy growth. Hedges such as Hawthorn and Hazel can be trimmed between June and September. Evergreen Hedging Evergreen plants like box and privet are often grown as hedging plants for their ability to cope with close trimming to create a dense stable mass of woody stems covered in foliage.Most evergreen hedging plants are vigorous shrubs and trees, which can be pruned at least twice a year, though more frequent cutting will create a denser hedge. By trimming in late spring and early summer, the young soft growth is targeted, which us easy to cut using shears or a powered hedgetrimmer. You could also cut later in summer, though this will result in a looser hedge which needs a more time-consuming cut with secateurs.Our friends at BBC Gardeners’ World Magazine have some further tips on how to trim an Evergreen hedge here. Tools of the trade Most people say it’s best to use secateurs or hand shears, so you don’t tear into the leaf, making it turn brown. Whichever tool you choose, prune back the new long shoots at an angle to two or three leaves from its base.Take a look at some of Hedges Direct’s garden shears here, from their Five Acres garden tools. Finesse your technique When you start pruning a large hedge, trim from the bottom to the top. This is very important, as it allows more sunlight to reach the bottom of the plants.You’re aiming eventually to have cut the hedge into an A shape; the slope you create is known as a ‘batter’. If you just cut upwards in a straight line, the top of the hedge, which always gets more sunlight anyway, will shade the base and you’ll have a plant that’s weaker at the bottom.If you’re cutting a formal hedge it’s worth putting up a line string to keep it level. Set the line of string by eye or by measuring from ground level on each cane, ensuring that the string is the same height all the way along. If there are any dips in the hedge that fall below the line, leave them uncut so that they can fill out.To minimise damage to individual leaves, hedging plants with large leaves, such as Hornbeam, are best cut with secateurs rather than shears or a hedge trimmer. The extra time and effort is worth it, if the hedge is in a very visible position. When using a hedge trimmer or shears you end up with a lot of cut leaves and these can turn brown and unsightly in hot weather. If you have any advice you’d like to ask our friends at Hedges Direct, make sure to find out more on their website here. You can also contact them with your questions or share your own hedge blog by email, on Facebook or on Twitter.With thanks to: Looking for garden inspiration? Find out what's on at the Autumn Fair Find out more about the BBC Good Food Market coming to the Autumn Fair
The proof is in the pruning
0 comment
The proof is in the pruning Pruning stimulates dense growth and reduces the plants natural tendency to grow as rapidly as possible, which would lead to a thin, sparse hedge. When to prune? How to prune? How often to prune? Am I cutting too much? Am I cutting too little? What are the best tools to use? …These are just some of the questions our friends at Hedges Direct get asked, so we thought we’d team up and explore the complicated world of hedging pruning.Find out more about pruning below from our friends at Hedges Direct, who supply garden products to the Show Gardens at BBC Gardeners’ World Live. Written by Hedges Direct Deciduous hedging Deciduous hedging is pruned in the summer to stop plants becoming unruly. This is considered maintenance pruning. In winter, deciduous shrubs, which shed their leaves, can be reshaped by cutting back hard. Most deciduous woody plants, including beech and hornbeam put on two flushes of growth in a year, one main flush during spring, and a second, smaller spurt, during late summer. Ideally, they should be trimmed back after each flush to keep them tidy.Beech and Hornbeam (carpinus betulus) hedging is best trimmed in August or September, as this will enhance the winter appearance and help to keep leaves on the branches for longer. Cut both hedges again in February if you want to keep them crisp. Tackle any major pruning as the plants go dormant and don’t prune in very dry weather.Deciduous flowering hedging plants such as Rosa Rugosa are pruned in spring, when you simply thin out any leggy growth. Hedges such as Hawthorn and Hazel can be trimmed between June and September. Evergreen Hedging Evergreen plants like box and privet are often grown as hedging plants for their ability to cope with close trimming to create a dense stable mass of woody stems covered in foliage.Most evergreen hedging plants are vigorous shrubs and trees, which can be pruned at least twice a year, though more frequent cutting will create a denser hedge. By trimming in late spring and early summer, the young soft growth is targeted, which us easy to cut using shears or a powered hedgetrimmer. You could also cut later in summer, though this will result in a looser hedge which needs a more time-consuming cut with secateurs.Our friends at BBC Gardeners’ World Magazine have some further tips on how to trim an Evergreen hedge here. Tools of the trade Most people say it’s best to use secateurs or hand shears, so you don’t tear into the leaf, making it turn brown. Whichever tool you choose, prune back the new long shoots at an angle to two or three leaves from its base.Take a look at some of Hedges Direct’s garden shears here, from their Five Acres garden tools. Finesse your technique When you start pruning a large hedge, trim from the bottom to the top. This is very important, as it allows more sunlight to reach the bottom of the plants.You’re aiming eventually to have cut the hedge into an A shape; the slope you create is known as a ‘batter’. If you just cut upwards in a straight line, the top of the hedge, which always gets more sunlight anyway, will shade the base and you’ll have a plant that’s weaker at the bottom.If you’re cutting a formal hedge it’s worth putting up a line string to keep it level. Set the line of string by eye or by measuring from ground level on each cane, ensuring that the string is the same height all the way along. If there are any dips in the hedge that fall below the line, leave them uncut so that they can fill out.To minimise damage to individual leaves, hedging plants with large leaves, such as Hornbeam, are best cut with secateurs rather than shears or a hedge trimmer. The extra time and effort is worth it, if the hedge is in a very visible position. When using a hedge trimmer or shears you end up with a lot of cut leaves and these can turn brown and unsightly in hot weather. If you have any advice you’d like to ask our friends at Hedges Direct, make sure to find out more on their website here. You can also contact them with your questions or share your own hedge blog by email, on Facebook or on Twitter.With thanks to: BBC Gardeners’ World Live will be back alongside the BBC Good Food Show Summer from 15-18 June 2023. Find out more below… Delve into garden inspiration from the 2022 Show Gardens and Beautiful Borders Find out more about the BBC Good Food Show Summer
Gift your garden goodies this Christmas
0 comment
Gift your garden goodies this Christmas If everything went to plan in your garden this season, you should now be busy reaping the rewards of all that work, harvesting an excess of courgettes, tomatoes and other goodies. So, if your freezer’s full and you’re fed up of ratatouille, why not share the bounty by making some produce-based gifts for Christmas. Rolawn, who supply garden products to the Small Space Gardens and Beautiful Borders at BBC Gardeners’ World Spring Fair, have put together a list of what they’ll be making this autumn. Read on below to find out more! You’ll need a good collection of jam jars or preserving jars, and some fabric and ribbon! Courgettes Curried Courgette & Chilli Relish The humble courgette is one plant that seems to succeed for everyone. When you’ve made all the soup and cakes you can eat, try preserving some as a relish. It’s a great way to prevent waste and makes a very welcome Christmas gift. Rolawn’s Customer Service Manager, Emily, found a great recipe to share: IngredientsMakes approx. 5 jars.1kg grated courgette, water drained (see below)1 very large onion (white or red), finely chopped2 ½ tbsp salt250ml vinegar (any vinegar is fine)225g caster sugar½ tsp ground pepper1 tsp salt1 red chilli, finely chopped (seeds removed, unless you like it hot!)¼ tsp ground nutmeg½ tbsp wholegrain mustard½ tbsp ground turmeric½ tbsp cornflour (made up as per packet instructions)1 tsp curry powder½ tsp ground corianderThe quantity of chilli and curry powder can be varied to taste. Removing water from courgettesThere are a couple of ways to do this. Traditionally, courgettes and other watery vegetables are salted, left for a while for the water to drain out, squeezed and rinsed.Emily prefers to grate the courgette and keep it in the freezer (a great way to store it when you have a glut, it can then be added to meals as you’re cooking!). She then defrosted it in a sieve over a large bowl overnight – a really easy way to remove the water.The courgette water can be used in smoothies, for cooking veg, in stock, or even in a courgette martini!MethodMix everything – except for the courgette and onion – in a large pan and bring to the boil.Add in the courgette and onion, bring back to the boil, then simmer uncovered for 30 minutes, stirring occasionally.Pour into sterilised jars whilst still warm. PicklingA note on pickling. If you’re planning to pickle your produce the first thing to consider is its freshness because the fresher it is the better. If you suspect yours is past its best, then it is better to use it for jams or chutneys instead. Courgette and Mint Soup This one is useful for eating up courgettes that have been picked for a few days.Serves 3-44 tbsp olive oil2 tbsp butter1 small onion, chopped or grated2 small courgettes, chopped or gratedA pinch of salt300g peas500ml stockA generous handful of mint MethodMelt the butter in a large saucepan and add half the oil. Over a medium heat, sauté the onion until soft, but not browned. Add the courgettes, season and cook for about five minutes before adding the peas and stock. Add extra water to cover the ingredients if necessary. Bring to the boil, then simmer for a few minutes. Check the seasoning, blend the mixture, thinning with more water if needed. Apples Mincemeat is a great way to use apple windfalls or extras that you’re struggling to store. Bottled up in nice preserve jars it could be added to a hamper. Alternatively, it would make a useful donation to school Christmas raffles or local community fairs. Raspberries Homemade tipples are always a favourite and so easy to make. Use 500g of raspberries and 250g of sugar per litre of gin or vodka. Add the raspberries and sugar to a sterilised preserving jar, pour in half the vodka, seal and shake well before adding the remaining vodka.Store the well-sealed jar in a cool, dark place, turning the contents daily, for the first week. After 2 to 3 weeks, strain the liquid into bottles and label. Dried herbsMost herbs can be preserved easily when dried. Simply hang herbs upside down in a warm, dry and airy place, covered with paper bags to prevent dust from settling on them. Once they are crispy dry, crunch them into airtight jars and they’ll keep you going until next year’s crop.  English lavender should really be pruned in the second half of August to help the new shoots to harden before winter, but if you’ve left it for the bees and butterflies to enjoy a while longer, then now is the time to give it a hard prune. Ideally, you would use the flower buds to make scented bags as they have the strongest concentration of essential oil but, rather than waste what you chop down now, you can still dry the seeds for lavender bags. To make these really simple bags, once the seeds are dry, cut some small circles of fabric (use a saucer or side plate as a template), place about a tablespoon of seeds in the centre then gather up the fabric and tie a piece of ribbon around to secure it.With all of these relatively simple creations you can spread the joy of your garden among friends, relatives and neighbours this Christmas. Or even just relish a little reminder of the enjoyment and pleasure you got from growing it all in the first place!  Setting up your beds for next yearDon’t forget, once you’ve harvested all your produce, the soils in your beds and borders may need to be revitalised. Make sure you’re using a suitable soil, in particular for edible crops – check that it is certified as suitable for residential home-grown use. Find out more in Rolawn’s Guide to selecting the right topsoil. About Rolawn Rolawn have been producing trusted turf and topsoils for fifty years. Grown and produced in the Vale of York, their consistent, horticulturally focused products are designed so that both domestic gardeners and horticultural professionals can create beautiful landscapes that will be enjoyed for years. Find out more about Rolawn here. Looking for spring inspiration? Discover the Showcase Gardens from Spring Fair here Delve into more garden inspiration, top tips and hear all our latest news

Gift your garden goodies this Christmas
0 comment
Gift your garden goodies this Christmas If everything went to plan in your garden this season, you should now be busy reaping the rewards of all that work, harvesting an excess of courgettes, tomatoes and other goodies. So, if your freezer’s full and you’re fed up of ratatouille, why not share the bounty by making some produce-based gifts for Christmas. Rolawn, who supply garden products to the Small Space Gardens and Beautiful Borders at BBC Gardeners’ World Autumn Fair, have put together a list of what they’ll be making this autumn. Read on below to find out more! You’ll need a good collection of jam jars or preserving jars, and some fabric and ribbon! Courgettes Curried Courgette & Chilli Relish The humble courgette is one plant that seems to succeed for everyone. When you’ve made all the soup and cakes you can eat, try preserving some as a relish. It’s a great way to prevent waste and makes a very welcome Christmas gift. Rolawn’s Customer Service Manager, Emily, found a great recipe to share: IngredientsMakes approx. 5 jars.1kg grated courgette, water drained (see below)1 very large onion (white or red), finely chopped2 ½ tbsp salt250ml vinegar (any vinegar is fine)225g caster sugar½ tsp ground pepper1 tsp salt1 red chilli, finely chopped (seeds removed, unless you like it hot!)¼ tsp ground nutmeg½ tbsp wholegrain mustard½ tbsp ground turmeric½ tbsp cornflour (made up as per packet instructions)1 tsp curry powder½ tsp ground corianderThe quantity of chilli and curry powder can be varied to taste. Removing water from courgettesThere are a couple of ways to do this. Traditionally, courgettes and other watery vegetables are salted, left for a while for the water to drain out, squeezed and rinsed.Emily prefers to grate the courgette and keep it in the freezer (a great way to store it when you have a glut, it can then be added to meals as you’re cooking!). She then defrosted it in a sieve over a large bowl overnight – a really easy way to remove the water.The courgette water can be used in smoothies, for cooking veg, in stock, or even in a courgette martini!MethodMix everything – except for the courgette and onion – in a large pan and bring to the boil.Add in the courgette and onion, bring back to the boil, then simmer uncovered for 30 minutes, stirring occasionally.Pour into sterilised jars whilst still warm. PicklingA note on pickling. If you’re planning to pickle your produce the first thing to consider is its freshness because the fresher it is the better. If you suspect yours is past its best, then it is better to use it for jams or chutneys instead. Courgette and Mint Soup This one is useful for eating up courgettes that have been picked for a few days.Serves 3-44 tbsp olive oil2 tbsp butter1 small onion, chopped or grated2 small courgettes, chopped or gratedA pinch of salt300g peas500ml stockA generous handful of mint MethodMelt the butter in a large saucepan and add half the oil. Over a medium heat, sauté the onion until soft, but not browned. Add the courgettes, season and cook for about five minutes before adding the peas and stock. Add extra water to cover the ingredients if necessary. Bring to the boil, then simmer for a few minutes. Check the seasoning, blend the mixture, thinning with more water if needed. Apples Mincemeat is a great way to use apple windfalls or extras that you’re struggling to store. Bottled up in nice preserve jars it could be added to a hamper. Alternatively, it would make a useful donation to school Christmas raffles or local community fairs. Raspberries Homemade tipples are always a favourite and so easy to make. Use 500g of raspberries and 250g of sugar per litre of gin or vodka. Add the raspberries and sugar to a sterilised preserving jar, pour in half the vodka, seal and shake well before adding the remaining vodka.Store the well-sealed jar in a cool, dark place, turning the contents daily, for the first week. After 2 to 3 weeks, strain the liquid into bottles and label. Dried herbsMost herbs can be preserved easily when dried. Simply hang herbs upside down in a warm, dry and airy place, covered with paper bags to prevent dust from settling on them. Once they are crispy dry, crunch them into airtight jars and they’ll keep you going until next year’s crop.  English lavender should really be pruned in the second half of August to help the new shoots to harden before winter, but if you’ve left it for the bees and butterflies to enjoy a while longer, then now is the time to give it a hard prune. Ideally, you would use the flower buds to make scented bags as they have the strongest concentration of essential oil but, rather than waste what you chop down now, you can still dry the seeds for lavender bags. To make these really simple bags, once the seeds are dry, cut some small circles of fabric (use a saucer or side plate as a template), place about a tablespoon of seeds in the centre then gather up the fabric and tie a piece of ribbon around to secure it.With all of these relatively simple creations you can spread the joy of your garden among friends, relatives and neighbours this Christmas. Or even just relish a little reminder of the enjoyment and pleasure you got from growing it all in the first place!  Setting up your beds for next yearDon’t forget, once you’ve harvested all your produce, the soils in your beds and borders may need to be revitalised. Make sure you’re using a suitable soil, in particular for edible crops – check that it is certified as suitable for residential home-grown use. Find out more in Rolawn’s Guide to selecting the right topsoil. About Rolawn Rolawn have been producing trusted turf and topsoils for fifty years. Grown and produced in the Vale of York, their consistent, horticulturally focused products are designed so that both domestic gardeners and horticultural professionals can create beautiful landscapes that will be enjoyed for years. Find out more about Rolawn here. Looking for garden inspiration? Find out what's on at the Autumn Fair Find out more about the BBC Good Food Market coming to the Autumn Fair
Gift your garden goodies this Christmas
0 comment
Gift your garden goodies this Christmas If everything went to plan in your garden this season, you should now be busy reaping the rewards of all that work, harvesting an excess of courgettes, tomatoes and other goodies. So, if your freezer’s full and you’re fed up of ratatouille, why not share the bounty by making some produce-based gifts for Christmas. Rolawn, who supply garden products to the Show Gardens and Beautiful Borders at BBC Gardeners’ World Live, have put together a list of what they’ll be making this autumn. Read on below to find out more! You’ll need a good collection of jam jars or preserving jars, and some fabric and ribbon! Courgettes Curried Courgette & Chilli Relish The humble courgette is one plant that seems to succeed for everyone. When you’ve made all the soup and cakes you can eat, try preserving some as a relish. It’s a great way to prevent waste and makes a very welcome Christmas gift. Rolawn’s Customer Service Manager, Emily, found a great recipe to share: IngredientsMakes approx. 5 jars.1kg grated courgette, water drained (see below)1 very large onion (white or red), finely chopped2 ½ tbsp salt250ml vinegar (any vinegar is fine)225g caster sugar½ tsp ground pepper1 tsp salt1 red chilli, finely chopped (seeds removed, unless you like it hot!)¼ tsp ground nutmeg½ tbsp wholegrain mustard½ tbsp ground turmeric½ tbsp cornflour (made up as per packet instructions)1 tsp curry powder½ tsp ground corianderThe quantity of chilli and curry powder can be varied to taste. Removing water from courgettesThere are a couple of ways to do this. Traditionally, courgettes and other watery vegetables are salted, left for a while for the water to drain out, squeezed and rinsed.Emily prefers to grate the courgette and keep it in the freezer (a great way to store it when you have a glut, it can then be added to meals as you’re cooking!). She then defrosted it in a sieve over a large bowl overnight – a really easy way to remove the water.The courgette water can be used in smoothies, for cooking veg, in stock, or even in a courgette martini!MethodMix everything – except for the courgette and onion – in a large pan and bring to the boil.Add in the courgette and onion, bring back to the boil, then simmer uncovered for 30 minutes, stirring occasionally.Pour into sterilised jars whilst still warm. PicklingA note on pickling. If you’re planning to pickle your produce the first thing to consider is its freshness because the fresher it is the better. If you suspect yours is past its best, then it is better to use it for jams or chutneys instead. Courgette and Mint Soup This one is useful for eating up courgettes that have been picked for a few days.Serves 3-44 tbsp olive oil2 tbsp butter1 small onion, chopped or grated2 small courgettes, chopped or gratedA pinch of salt300g peas500ml stockA generous handful of mint MethodMelt the butter in a large saucepan and add half the oil. Over a medium heat, sauté the onion until soft, but not browned. Add the courgettes, season and cook for about five minutes before adding the peas and stock. Add extra water to cover the ingredients if necessary. Bring to the boil, then simmer for a few minutes. Check the seasoning, blend the mixture, thinning with more water if needed. Apples Mincemeat is a great way to use apple windfalls or extras that you’re struggling to store. Bottled up in nice preserve jars it could be added to a hamper. Alternatively, it would make a useful donation to school Christmas raffles or local community fairs. Raspberries Homemade tipples are always a favourite and so easy to make. Use 500g of raspberries and 250g of sugar per litre of gin or vodka. Add the raspberries and sugar to a sterilised preserving jar, pour in half the vodka, seal and shake well before adding the remaining vodka.Store the well-sealed jar in a cool, dark place, turning the contents daily, for the first week. After 2 to 3 weeks, strain the liquid into bottles and label. Dried herbsMost herbs can be preserved easily when dried. Simply hang herbs upside down in a warm, dry and airy place, covered with paper bags to prevent dust from settling on them. Once they are crispy dry, crunch them into airtight jars and they’ll keep you going until next year’s crop.  English lavender should really be pruned in the second half of August to help the new shoots to harden before winter, but if you’ve left it for the bees and butterflies to enjoy a while longer, then now is the time to give it a hard prune. Ideally, you would use the flower buds to make scented bags as they have the strongest concentration of essential oil but, rather than waste what you chop down now, you can still dry the seeds for lavender bags. To make these really simple bags, once the seeds are dry, cut some small circles of fabric (use a saucer or side plate as a template), place about a tablespoon of seeds in the centre then gather up the fabric and tie a piece of ribbon around to secure it.With all of these relatively simple creations you can spread the joy of your garden among friends, relatives and neighbours this Christmas. Or even just relish a little reminder of the enjoyment and pleasure you got from growing it all in the first place!  Setting up your beds for next yearDon’t forget, once you’ve harvested all your produce, the soils in your beds and borders may need to be revitalised. Make sure you’re using a suitable soil, in particular for edible crops – check that it is certified as suitable for residential home-grown use. Find out more in Rolawn’s Guide to selecting the right topsoil. About Rolawn Rolawn have been producing trusted turf and topsoils for fifty years. Grown and produced in the Vale of York, their consistent, horticulturally focused products are designed so that both domestic gardeners and horticultural professionals can create beautiful landscapes that will be enjoyed for years. Find out more about Rolawn here. BBC Gardeners’ World Live will be back alongside the BBC Good Food Show Summer from 15-18 June 2023. Find out more below… Delve into garden inspiration from the 2022 Show Gardens and Beautiful Borders Find out more about the BBC Good Food Show Summer
Grow your own mushrooms!
0 comment
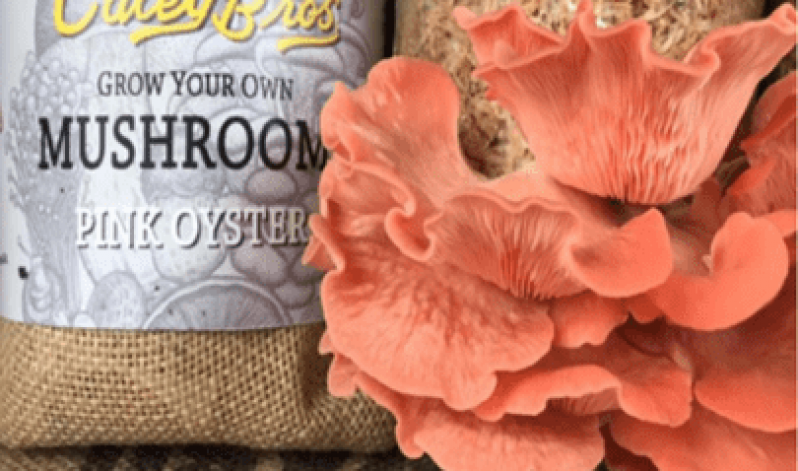
Grow your own mushrooms Have you ever considered growing mushrooms at home? Taking up just a small space, mushrooms are easy and delicious to grow at home.At BBC Gardeners’ World Autumn Fair, the Oyster Mushroom Workshop will be brought to the Fair by Jodie and Lorraine of the Sussex-based Caley Brothers, with plenty of grow your own inspiration in abundance.Read on below to find out more from the Caley Brothers about why mushrooms are great to grow, and for some pointers to get the most out of your mushrooms. Written by the Caley Brothers The Caley Brother’s actively encourage everyone to get growing their own gourmet mushrooms athome – if only to witness just how amazing and easy the grow cycle of a mushroom is.A common misconception for growing mushrooms at home is often the need of a darkcupboard, or damp environment. These ideas seem to have stemmed from the mushroom growingdays of the 80s and 90s, where button mushrooms were grown in polystyrene boxes kept underthe sink, or even the bed in some cases. Well it was certainly for the Caley Brothers growing up!You don’t need much space to grow mushrooms either – the Caley Brothers kits can be grown in kitchens, and on windowsills. At Caley Brothers, the mushroom grow kits have been purposefully designed for growing at home,and in full sight. They like the light and once your baby mushroom pins start to appear you’ll be amazed at just how fast they grow and how beautiful they are as they begin to unfurl. From first pins to full grown mushrooms can take just 7-10 days, and they then double in size every 12-24 hours, right up to harvesting. A great mushroom to start growing is the Grey Oyster mushroom. They are incredibly versatile as a mushroom and they will grow on a variety of substrates. The Caley Brothers use used coffee grounds and sawdust as the base of their kits, but they can also be grown on logs, books and even rolled up jeans. The mushrooms can be grown throughout the year inside or out. You don’t have to have ‘green fingers’ to grow mushrooms either, especially if you start out with a kit. Unlike many houseplants, you can’t over water an oyster mushroom grow kit, and if they accidently dry out, a good soak in cold water over night, can usually spur them on again. Top Tips for GrowingStart with a ready to grow kit. Getting yourself a ready colonised grow kit is a great first step when beginning to grow your own mushrooms. There’s a massive variety of edible mushrooms kits on the market to help get you growing.Make sure you buy your kit or mushroom spawn from a trusted and reputable supplier. They’ll be keen to get you growing and will support you through your growing process with help and guidance.Don’t be afraid to give it a go. Mushrooms are really easy to grow and not a massive investment. Once you’ve finished growing, the mycelium within your kit is a great soil conditioner and can go straight into your garden. Once you’ve harvested your first mushrooms, the texture and smell is probably the first thing you’ll notice. They’re fairly robust, and have a lovely mild earthiness about them – both of which you don’t get from your shop brought, or plastic packaged mushrooms and this why you should try it yourselves – there’s just something about growing your own food that makes it look, feel and taste better than anything shop bought.Grow kits will usually offer you the chance to grow a number of flushes over the course of a few months. But – when you’ve finished with your grow kit or mushroom substrate, although the energy inside is spent and unable to produce any more mushrooms, you’ll still have a block of living mycelium that, if given more nutrients will keep on going. If you put this to use in your garden, veg patch, compost heap or into your plant pots, the mycelium will continue to work its way into the soil and help nourish the roots and plants, working in tandem to recondition your soil. If you’re lucky, over time you may even get more mushrooms popping up amongst your plants or compost heap. After you’ve mastered the home grown mushroom, you can venture onto other varieties of mushrooms like Lion’s Mane, Reishi, Shiitake and Black Pearl. You can even grow outside in mushroom beds or on logs. They’re great companion ‘plants’ and can be grown throughout the year amongst your flowers beds and on your vegetable patch – just don’t forget to water them like you would your other plants.Growing mushrooms is really simple and hugely rewarding. Time to get growing your own! At the BBC Gardeners World Autumn Fair the Caley Brothers are hosting a number of workshops throughout the show where they’ll be demonstrating just how easy it is to make your own kit and to grow and harvest your own flush of Oyster mushrooms at home. Find out more here.Every attendee will receive their own sachet of Grey Oyster mycelium, along with a full set of instructions and all you need to make your own mushroom kit so you too and get growing at home. On our stall they’ll have a series of ready to grow kits and will be on hand to help with any mushroom growing questions you may have, so do come armed with any questions you may have.Find out more about the Caley Brothers here. Looking for spring inspiration? Discover the Showcase Gardens from Spring Fair here Delve into more garden inspiration, top tips and hear all our latest news
Grow your own mushrooms!
0 comment
Grow your own mushrooms Have you ever considered growing mushrooms at home? Taking up just a small space, mushrooms are easy and delicious to grow at home.At BBC Gardeners’ World Autumn Fair, Oyster Mushroom Workshops will be hosted by Jodie and Lorraine of the Sussex-based Caley Brothers, with plenty of grow your own inspiration in abundance.Read on below to find out more from the Caley Brothers about why mushrooms are great to grow, and for some pointers to get the most out of your mushrooms. BOOK TICKETS AND WORKSHOPS Written by the Caley Brothers The Caley Brother’s actively encourage everyone to get growing their own gourmet mushrooms athome – if only to witness just how amazing and easy the grow cycle of a mushroom is.A common misconception for growing mushrooms at home is often the need of a darkcupboard, or damp environment. These ideas seem to have stemmed from the mushroom growingdays of the 80s and 90s, where button mushrooms were grown in polystyrene boxes kept underthe sink, or even the bed in some cases. Well it was certainly for the Caley Brothers growing up!You don’t need much space to grow mushrooms either – the Caley Brothers kits can be grown in kitchens, and on windowsills. At Caley Brothers, the mushroom grow kits have been purposefully designed for growing at home,and in full sight. They like the light and once your baby mushroom pins start to appear you’ll be amazed at just how fast they grow and how beautiful they are as they begin to unfurl. From first pins to full grown mushrooms can take just 7-10 days, and they then double in size every 12-24 hours, right up to harvesting. A great mushroom to start growing is the Grey Oyster mushroom. They are incredibly versatile as a mushroom and they will grow on a variety of substrates. The Caley Brothers use used coffee grounds and sawdust as the base of their kits, but they can also be grown on logs, books and even rolled up jeans. The mushrooms can be grown throughout the year inside or out. You don’t have to have ‘green fingers’ to grow mushrooms either, especially if you start out with a kit. Unlike many houseplants, you can’t over water an oyster mushroom grow kit, and if they accidently dry out, a good soak in cold water over night, can usually spur them on again. Top Tips for GrowingStart with a ready to grow kit. Getting yourself a ready colonised grow kit is a great first step when beginning to grow your own mushrooms. There’s a massive variety of edible mushrooms kits on the market to help get you growing.Make sure you buy your kit or mushroom spawn from a trusted and reputable supplier. They’ll be keen to get you growing and will support you through your growing process with help and guidance.Don’t be afraid to give it a go. Mushrooms are really easy to grow and not a massive investment. Once you’ve finished growing, the mycelium within your kit is a great soil conditioner and can go straight into your garden. Once you’ve harvested your first mushrooms, the texture and smell is probably the first thing you’ll notice. They’re fairly robust, and have a lovely mild earthiness about them – both of which you don’t get from your shop brought, or plastic packaged mushrooms and this why you should try it yourselves – there’s just something about growing your own food that makes it look, feel and taste better than anything shop bought.Grow kits will usually offer you the chance to grow a number of flushes over the course of a few months. But – when you’ve finished with your grow kit or mushroom substrate, although the energy inside is spent and unable to produce any more mushrooms, you’ll still have a block of living mycelium that, if given more nutrients will keep on going. If you put this to use in your garden, veg patch, compost heap or into your plant pots, the mycelium will continue to work its way into the soil and help nourish the roots and plants, working in tandem to recondition your soil. If you’re lucky, over time you may even get more mushrooms popping up amongst your plants or compost heap. After you’ve mastered the home grown mushroom, you can venture onto other varieties of mushrooms like Lion’s Mane, Reishi, Shiitake and Black Pearl. You can even grow outside in mushroom beds or on logs. They’re great companion ‘plants’ and can be grown throughout the year amongst your flowers beds and on your vegetable patch – just don’t forget to water them like you would your other plants.Growing mushrooms is really simple and hugely rewarding. Time to get growing your own! At the BBC Gardeners World Autumn Fair the Caley Brothers are hosting a number of workshops throughout the show where they’ll be demonstrating just how easy it is to make your own kit and to grow and harvest your own flush of Oyster mushrooms at home. Find out more here.Every attendee will receive their own sachet of Grey Oyster mycelium, along with a full set of instructions and all you need to make your own mushroom kit so you too and get growing at home. On our stall they’ll have a series of ready to grow kits and will be on hand to help with any mushroom growing questions you may have, so do come armed with any questions you may have.Find out more about the Caley Brothers here. BOOK TICKETS AND WORKSHOPS Looking for garden inspiration? Find out what's on at the Autumn Fair Find out more about the Oyster Mushroom Workshops at the Fair
Grow your own mushrooms!
0 comment
Grow your own mushrooms Have you ever considered growing mushrooms at home? Taking up just a small space, mushrooms are easy and delicious to grow at home.At BBC Gardeners’ World Autumn Fair, the Oyster Mushroom Workshop will be brought to the Fair by Jodie and Lorraine of the Sussex-based Caley Brothers, with plenty of grow your own inspiration in abundance.Read on below to find out more from the Caley Brothers about why mushrooms are great to grow, and for some pointers to get the most out of your mushrooms. Written by the Caley Brothers The Caley Brother’s actively encourage everyone to get growing their own gourmet mushrooms athome – if only to witness just how amazing and easy the grow cycle of a mushroom is.A common misconception for growing mushrooms at home is often the need of a darkcupboard, or damp environment. These ideas seem to have stemmed from the mushroom growingdays of the 80s and 90s, where button mushrooms were grown in polystyrene boxes kept underthe sink, or even the bed in some cases. Well it was certainly for the Caley Brothers growing up!You don’t need much space to grow mushrooms either – the Caley Brothers kits can be grown in kitchens, and on windowsills. At Caley Brothers, the mushroom grow kits have been purposefully designed for growing at home,and in full sight. They like the light and once your baby mushroom pins start to appear you’ll be amazed at just how fast they grow and how beautiful they are as they begin to unfurl. From first pins to full grown mushrooms can take just 7-10 days, and they then double in size every 12-24 hours, right up to harvesting. A great mushroom to start growing is the Grey Oyster mushroom. They are incredibly versatile as a mushroom and they will grow on a variety of substrates. The Caley Brothers use used coffee grounds and sawdust as the base of their kits, but they can also be grown on logs, books and even rolled up jeans. The mushrooms can be grown throughout the year inside or out. You don’t have to have ‘green fingers’ to grow mushrooms either, especially if you start out with a kit. Unlike many houseplants, you can’t over water an oyster mushroom grow kit, and if they accidently dry out, a good soak in cold water over night, can usually spur them on again. Top Tips for GrowingStart with a ready to grow kit. Getting yourself a ready colonised grow kit is a great first step when beginning to grow your own mushrooms. There’s a massive variety of edible mushrooms kits on the market to help get you growing.Make sure you buy your kit or mushroom spawn from a trusted and reputable supplier. They’ll be keen to get you growing and will support you through your growing process with help and guidance.Don’t be afraid to give it a go. Mushrooms are really easy to grow and not a massive investment. Once you’ve finished growing, the mycelium within your kit is a great soil conditioner and can go straight into your garden. Once you’ve harvested your first mushrooms, the texture and smell is probably the first thing you’ll notice. They’re fairly robust, and have a lovely mild earthiness about them – both of which you don’t get from your shop brought, or plastic packaged mushrooms and this why you should try it yourselves – there’s just something about growing your own food that makes it look, feel and taste better than anything shop bought.Grow kits will usually offer you the chance to grow a number of flushes over the course of a few months. But – when you’ve finished with your grow kit or mushroom substrate, although the energy inside is spent and unable to produce any more mushrooms, you’ll still have a block of living mycelium that, if given more nutrients will keep on going. If you put this to use in your garden, veg patch, compost heap or into your plant pots, the mycelium will continue to work its way into the soil and help nourish the roots and plants, working in tandem to recondition your soil. If you’re lucky, over time you may even get more mushrooms popping up amongst your plants or compost heap. After you’ve mastered the home grown mushroom, you can venture onto other varieties of mushrooms like Lion’s Mane, Reishi, Shiitake and Black Pearl. You can even grow outside in mushroom beds or on logs. They’re great companion ‘plants’ and can be grown throughout the year amongst your flowers beds and on your vegetable patch – just don’t forget to water them like you would your other plants.Growing mushrooms is really simple and hugely rewarding. Time to get growing your own! At the BBC Gardeners World Autumn Fair the Caley Brothers are hosting a number of workshops throughout the show where they’ll be demonstrating just how easy it is to make your own kit and to grow and harvest your own flush of Oyster mushrooms at home. Find out more here.Every attendee will receive their own sachet of Grey Oyster mycelium, along with a full set of instructions and all you need to make your own mushroom kit so you too and get growing at home. On our stall they’ll have a series of ready to grow kits and will be on hand to help with any mushroom growing questions you may have, so do come armed with any questions you may have.Find out more about the Caley Brothers here. Delve into garden inspiration from the 2022 Show Gardens and Beautiful Borders Discover even more top tips, inspiration and our latest news
Cut flowers to brighten your home
0 comment
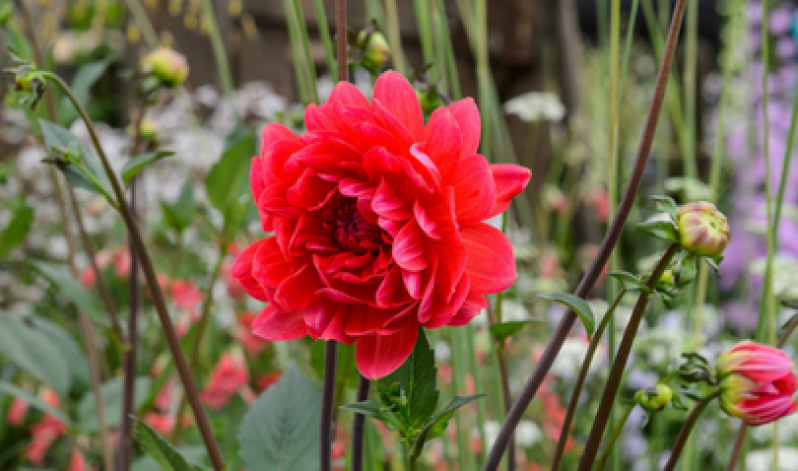
Cut flowers to brighten your home In these warm months of summer, there’s plenty of vibrant, beautiful flowers blooming into life.  Brighten up your home with cut flowers to bring a snippet of your summer garden inside.  Check out our pointers below to find out how to grow the best cut flowers. With thanks to our friends at BBC Gardeners’ World Magazine. Plus, we’ve got an extra summer treat for you. Did you know you can crystallise cut flowers for cake decorations? We’ve got a special recipe from Dame Mary Berry, as made on the Big Kitchen at this year’s BBC Good Food Show Summer. Find out more below… /*! elementor - v3.19.0 - 07-02-2024 */ .elementor-widget-video .elementor-widget-container{overflow:hidden;transform:translateZ(0)}.elementor-widget-video .elementor-wrapper{aspect-ratio:var(--video-aspect-ratio)}.elementor-widget-video .elementor-wrapper iframe,.elementor-widget-video .elementor-wrapper video{height:100%;width:100%;display:flex;border:none;background-color:#000}@supports not (aspect-ratio:1/1){.elementor-widget-video .elementor-wrapper{position:relative;overflow:hidden;height:0;padding-bottom:calc(100% / var(--video-aspect-ratio))}.elementor-widget-video .elementor-wrapper iframe,.elementor-widget-video .elementor-wrapper video{position:absolute;top:0;right:0;bottom:0;left:0}}.elementor-widget-video .elementor-open-inline .elementor-custom-embed-image-overlay{position:absolute;top:0;right:0;bottom:0;left:0;background-size:cover;background-position:50%}.elementor-widget-video .elementor-custom-embed-image-overlay{cursor:pointer;text-align:center}.elementor-widget-video .elementor-custom-embed-image-overlay:hover .elementor-custom-embed-play i{opacity:1}.elementor-widget-video .elementor-custom-embed-image-overlay img{display:block;width:100%;aspect-ratio:var(--video-aspect-ratio);-o-object-fit:cover;object-fit:cover;-o-object-position:center center;object-position:center center}@supports not (aspect-ratio:1/1){.elementor-widget-video .elementor-custom-embed-image-overlay{position:relative;overflow:hidden;height:0;padding-bottom:calc(100% / var(--video-aspect-ratio))}.elementor-widget-video .elementor-custom-embed-image-overlay img{position:absolute;top:0;right:0;bottom:0;left:0}}.elementor-widget-video .e-hosted-video .elementor-video{-o-object-fit:cover;object-fit:cover}.e-con-inner>.elementor-widget-video,.e-con>.elementor-widget-video{width:var(--container-widget-width);--flex-grow:var(--container-widget-flex-grow)} Tips for cut flowersCut flowers can bring a wonderful pop of colour to your garden, windowsill or kitchen table, and there’s so many varieties available to grow.Here are some top tips for growing cut flowers, from our friends at BBC Gardeners’ World Magazine:Give plants lots of space by thinning out the seedlingsCut off side shoots to focus the plant’s energy on producing flowersKeep on top of weedsUse twine or canes to keep your flowers off the groundWater and feed regularlyCut flowers regularly to encourage new bloomsThe best time to pick flowers is in the morning, when their stems are full of water. The next best time is the evening Elderflower and limoncello syllabubThis recipe, from Dame Mary Berry, is from the BBC Good Food Show Summer, as seen on the Big Kitchen. Serves 6Syllabub is made from curdling sweet cream or milk with an acid, such as cider or wine. Top with beautiful crystallised flowers for an especially summery sweet treat.Ingredients:100ml elderflower cordial3 tbsp limoncello1 lemon, juiced300ml pouring double creamCrystallised flowers, raspberries or mint sprigs MethodTip the cordial, limoncello and lemon juice into a large mixing bowl and pour in the double cream. Whisk using an electric whisk until you reach soft peaks.Spoon the mixture into six glasses and place in the fridge to chill. Top with crystallised flowers, raspberries or mint sprigs to serve. How to crystallise your flowersThis recipe is from the BBC Good Food Magazine.Ingredients1 large egg white1 tbsp waterpetals from your cut flowers55g/2oz superfine caster sugarMethodStir together the egg white and water in a small bowl. Then, grasping your petals with some tweezers, brush the egg mixture onto both sides of the petals.In a different bowl, pour in the sugar and toss in the petals. Once coated, transfer to a rack and leave the petals to dry for at least 6 hours. Looking for spring inspiration? Discover the Showcase Gardens from Spring Fair here Delve into more garden inspiration, top tips and hear all our latest news
Cut flowers to brighten your home
0 comment
Cut flowers to brighten your home In these warm months of summer, there’s plenty of vibrant, beautiful flowers blooming into life.  Brighten up your home with cut flowers to bring a snippet of your summer garden inside.  Check out our pointers below to find out how to grow the best cut flowers. With thanks to our friends at BBC Gardeners’ World Magazine. Plus, we’ve got an extra summer treat for you. Did you know you can crystallise cut flowers for cake decorations? We’ve got a special recipe from Dame Mary Berry, as made on the Big Kitchen at this year’s BBC Good Food Show Summer. Find out more below… Tips for cut flowersCut flowers can bring a wonderful pop of colour to your garden, windowsill or kitchen table, and there’s so many varieties available to grow.Here are some top tips for growing cut flowers, from our friends at BBC Gardeners’ World Magazine:Give plants lots of space by thinning out the seedlingsCut off side shoots to focus the plant’s energy on producing flowersKeep on top of weedsUse twine or canes to keep your flowers off the groundWater and feed regularlyCut flowers regularly to encourage new bloomsThe best time to pick flowers is in the morning, when their stems are full of water. The next best time is the evening Elderflower and limoncello syllabubThis recipe, from Dame Mary Berry, is from the BBC Good Food Show Summer, as seen on the Big Kitchen. Serves 6Syllabub is made from curdling sweet cream or milk with an acid, such as cider or wine. Top with beautiful crystallised flowers for an especially summery sweet treat.Ingredients:100ml elderflower cordial3 tbsp limoncello1 lemon, juiced300ml pouring double creamCrystallised flowers, raspberries or mint sprigs MethodTip the cordial, limoncello and lemon juice into a large mixing bowl and pour in the double cream. Whisk using an electric whisk until you reach soft peaks.Spoon the mixture into six glasses and place in the fridge to chill. Top with crystallised flowers, raspberries or mint sprigs to serve. How to crystallise your flowersThis recipe is from the BBC Good Food Magazine.Ingredients1 large egg white1 tbsp waterpetals from your cut flowers55g/2oz superfine caster sugarMethodStir together the egg white and water in a small bowl. Then, grasping your petals with some tweezers, brush the egg mixture onto both sides of the petals.In a different bowl, pour in the sugar and toss in the petals. Once coated, transfer to a rack and leave the petals to dry for at least 6 hours. Looking for garden inspiration? Find out what's on at the Autumn Fair Find out more about the BBC Good Food Market coming to the Autumn Fair
Cut flowers to brighten your home
0 comment
Cut flowers to brighten your home In these warm months of summer, there’s plenty of vibrant, beautiful flowers blooming into life.  Brighten up your home with cut flowers to bring a snippet of your summer garden inside.  Check out our pointers below to find out how to grow the best cut flowers. With thanks to our friends at BBC Gardeners’ World Magazine. Plus, we’ve got an extra summer treat for you. Did you know you can crystallise cut flowers for cake decorations? We’ve got a special recipe from Dame Mary Berry, as made on the Big Kitchen at this year’s BBC Good Food Show Summer. Find out more below… Tips for cut flowersCut flowers can bring a wonderful pop of colour to your garden, windowsill or kitchen table, and there’s so many varieties available to grow.Here are some top tips for growing cut flowers, from our friends at BBC Gardeners’ World Magazine:Give plants lots of space by thinning out the seedlingsCut off side shoots to focus the plant’s energy on producing flowersKeep on top of weedsUse twine or canes to keep your flowers off the groundWater and feed regularlyCut flowers regularly to encourage new bloomsThe best time to pick flowers is in the morning, when their stems are full of water. The next best time is the evening Elderflower and limoncello syllabubThis recipe, from Dame Mary Berry, is from the BBC Good Food Show Summer, as seen on the Big Kitchen. Serves 6Syllabub is made from curdling sweet cream or milk with an acid, such as cider or wine. Top with beautiful crystallised flowers for an especially summery sweet treat.Ingredients:100ml elderflower cordial3 tbsp limoncello1 lemon, juiced300ml pouring double creamCrystallised flowers, raspberries or mint sprigs MethodTip the cordial, limoncello and lemon juice into a large mixing bowl and pour in the double cream. Whisk using an electric whisk until you reach soft peaks.Spoon the mixture into six glasses and place in the fridge to chill. Top with crystallised flowers, raspberries or mint sprigs to serve. How to crystallise your flowersThis recipe is from the BBC Good Food Magazine.Ingredients1 large egg white1 tbsp waterpetals from your cut flowers55g/2oz superfine caster sugarMethodStir together the egg white and water in a small bowl. Then, grasping your petals with some tweezers, brush the egg mixture onto both sides of the petals.In a different bowl, pour in the sugar and toss in the petals. Once coated, transfer to a rack and leave the petals to dry for at least 6 hours. BBC Gardeners’ World Live will be back alongside the BBC Good Food Show Summer from 15-18 June 2023. Find out more below… Delve into garden inspiration from the 2022 Show Gardens and Beautiful Borders Find out more about the BBC Good Food Show Summer