Oct 25, 2023
0 comment
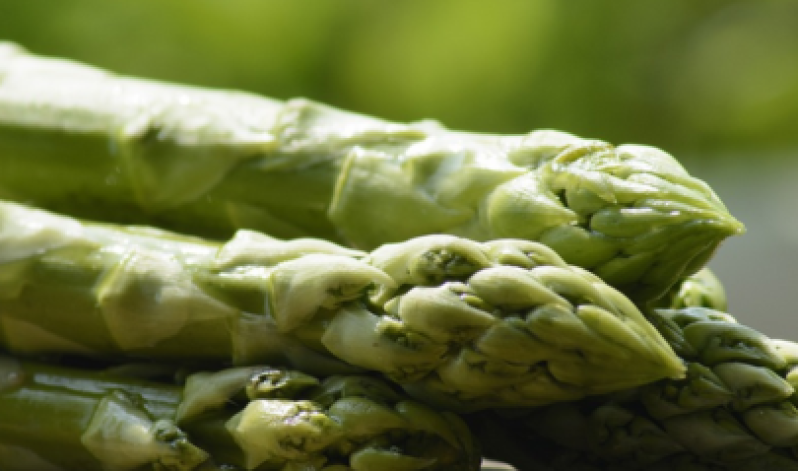
Time to grow: asparagus
This November, add asparagus to your vegetable patch for a delicious addition to your summer table with some advice from BBC Gardeners’ World Magazine. What’s more, you’ll be able to put your asparagus to use with a delicious gnocchi with asaparagus, lemon and ricotta recipe, as seen on the Summer Kitchen with Chris Baber at the BBC Good Food Show Summer 2023.
Asparagus is a tasty vegetable that grows every summer. Some may think it’s hard to grow asparagus because it needs a lot of space and time. It’s true that you won’t get any shoots to eat in the beginning, but after a few years, it’s definitely worth it. Plus, once you get it going, taking care of the asparagus is not too difficult, and you can enjoy it for up to 20 years.
How to growAsparagus plants thrive in soil that gets a lot of light and can drain well. If your soil is heavy, you can still grow asparagus, but it’s a good idea to build a raised bed for it. Pick a sunny spot and make sure the soil is well-prepared with lots of natural material like compost, and make sure it’s free from weeds.If you happen to get an existing asparagus bed, it’s best not to replace it with new plants. If you want to grow more asparagus, find a different spot that doesn’t have asparagus diseases. Also, avoid planting asparagus where you previously grew potatoes.Asparagus can be raised from seed, but the most reliable method is to plant one-year-old dormant plants called ‘crowns’ in March. Some varieties can also be planted in autumn.
/*! elementor - v3.19.0 - 07-02-2024 */
.elementor-widget-image{text-align:center}.elementor-widget-image a{display:inline-block}.elementor-widget-image a img[src$=".svg"]{width:48px}.elementor-widget-image img{vertical-align:middle;display:inline-block}
PlantingWhen you plant new asparagus crowns, make sure to give them enough water and keep the area free from weeds. Let the crowns grow lots of feathery leaves so they can become healthy and strong. It’s important not to pick any asparagus during the first two years because it will make the plants weaker. At the end of the growing season, trim the foliage to about 10 centimeters above the ground, and in the fall, cover the area with compost that has decomposed well. Also, make sure to keep the area free from weeds and remove any asparagus beetles you see in the spring.
CareAfter you plant asparagus, avoid picking any for the first two years. When the third year rolls around, you can start harvesting in mid-April when the spears reach about 18 centimeters in height. Use a sharp knife to cut them about 2.5 centimeters below the soil level. If the weather is warm, you can pick them every two to three days for about four weeks. In the following years, you can harvest over a longer period.Stop gathering asparagus around mid-June. This break allows the plant to store energy for the next year. It’s also a good time to provide some general fertilizer to the plants.
Problem solvingKeep an eye out for asparagus beetles from late spring onward. If you spot any tiny bugs or adult beetles, remove and destroy them. At the end of the year, burn the old asparagus stems to get rid of any beetles that might be hiding for the winter.Asparagus can also suffer from a disease called violet crown rot, which makes the base of the plants rot. If this happens, you’ll need to dig up the affected plants, burn them, and start fresh in a new spot
/*! elementor - v3.19.0 - 07-02-2024 */
.elementor-widget-divider{--divider-border-style:none;--divider-border-width:1px;--divider-color:#0c0d0e;--divider-icon-size:20px;--divider-element-spacing:10px;--divider-pattern-height:24px;--divider-pattern-size:20px;--divider-pattern-url:none;--divider-pattern-repeat:repeat-x}.elementor-widget-divider .elementor-divider{display:flex}.elementor-widget-divider .elementor-divider__text{font-size:15px;line-height:1;max-width:95%}.elementor-widget-divider .elementor-divider__element{margin:0 var(--divider-element-spacing);flex-shrink:0}.elementor-widget-divider .elementor-icon{font-size:var(--divider-icon-size)}.elementor-widget-divider .elementor-divider-separator{display:flex;margin:0;direction:ltr}.elementor-widget-divider--view-line_icon .elementor-divider-separator,.elementor-widget-divider--view-line_text .elementor-divider-separator{align-items:center}.elementor-widget-divider--view-line_icon .elementor-divider-separator:after,.elementor-widget-divider--view-line_icon .elementor-divider-separator:before,.elementor-widget-divider--view-line_text .elementor-divider-separator:after,.elementor-widget-divider--view-line_text .elementor-divider-separator:before{display:block;content:"";border-block-end:0;flex-grow:1;border-block-start:var(--divider-border-width) var(--divider-border-style) var(--divider-color)}.elementor-widget-divider--element-align-left .elementor-divider .elementor-divider-separator>.elementor-divider__svg:first-of-type{flex-grow:0;flex-shrink:100}.elementor-widget-divider--element-align-left .elementor-divider-separator:before{content:none}.elementor-widget-divider--element-align-left .elementor-divider__element{margin-left:0}.elementor-widget-divider--element-align-right .elementor-divider .elementor-divider-separator>.elementor-divider__svg:last-of-type{flex-grow:0;flex-shrink:100}.elementor-widget-divider--element-align-right .elementor-divider-separator:after{content:none}.elementor-widget-divider--element-align-right .elementor-divider__element{margin-right:0}.elementor-widget-divider--element-align-start .elementor-divider .elementor-divider-separator>.elementor-divider__svg:first-of-type{flex-grow:0;flex-shrink:100}.elementor-widget-divider--element-align-start .elementor-divider-separator:before{content:none}.elementor-widget-divider--element-align-start .elementor-divider__element{margin-inline-start:0}.elementor-widget-divider--element-align-end .elementor-divider .elementor-divider-separator>.elementor-divider__svg:last-of-type{flex-grow:0;flex-shrink:100}.elementor-widget-divider--element-align-end .elementor-divider-separator:after{content:none}.elementor-widget-divider--element-align-end .elementor-divider__element{margin-inline-end:0}.elementor-widget-divider:not(.elementor-widget-divider--view-line_text):not(.elementor-widget-divider--view-line_icon) .elementor-divider-separator{border-block-start:var(--divider-border-width) var(--divider-border-style) var(--divider-color)}.elementor-widget-divider--separator-type-pattern{--divider-border-style:none}.elementor-widget-divider--separator-type-pattern.elementor-widget-divider--view-line .elementor-divider-separator,.elementor-widget-divider--separator-type-pattern:not(.elementor-widget-divider--view-line) .elementor-divider-separator:after,.elementor-widget-divider--separator-type-pattern:not(.elementor-widget-divider--view-line) .elementor-divider-separator:before,.elementor-widget-divider--separator-type-pattern:not([class*=elementor-widget-divider--view]) .elementor-divider-separator{width:100%;min-height:var(--divider-pattern-height);-webkit-mask-size:var(--divider-pattern-size) 100%;mask-size:var(--divider-pattern-size) 100%;-webkit-mask-repeat:var(--divider-pattern-repeat);mask-repeat:var(--divider-pattern-repeat);background-color:var(--divider-color);-webkit-mask-image:var(--divider-pattern-url);mask-image:var(--divider-pattern-url)}.elementor-widget-divider--no-spacing{--divider-pattern-size:auto}.elementor-widget-divider--bg-round{--divider-pattern-repeat:round}.rtl .elementor-widget-divider .elementor-divider__text{direction:rtl}.e-con-inner>.elementor-widget-divider,.e-con>.elementor-widget-divider{width:var(--container-widget-width,100%);--flex-grow:var(--container-widget-flex-grow)}
Gnocchi with asparagus, lemon and ricotta
As seen on the Summer Kitchen with Chris Baber at the BBC Good Food Show Summer 2023.
Serves 2500g shop bought gnocchi2 tbsp olive oil2 garlic cloves, sliced250g asparagus, cut into bite-sized piecesknob of butterhandful of grated parmesan1 tbsp lemon juiceZest of 1/2 lemon 4 tbsp ricottahandful of rocket leavesdrizzle extra virgin oil, to serve
Cook the gnocchi in a large pan of boiling water for a couple of minutes until it rises to the surface. Drain and allow to steam-dry in the strainer for 2 mins.While the gnocchi is cooking, heat 1 tbsp oil in a large frying pan over a medium hear. Add the garlic and asparagus with a pinch of salt and pepper, plus 2 tbsp water from the gnocchi pan to create some steam, then cook for 3 mins stirring now and again. Transfer the cooked asparagus to a plate.Put the pan back on a medium-high heat. Add the remaining oil to the pan with the butter. When the butter has melted and starts to foam, add the gnocchi. Fry for a couple of minutes until slightly golden.Add the asparagus back to the pan with a splash of water, the grated parmesan and the zest of half the lemon. Toss together for a minute, then stir through the riccota, a squeeze of lemon juice and seasoning.Serve up, then top with a handful of rocket and a drizzle of extra virgin olive oil.
Find more grow your own recipes
Find out more about the Show